The central air conditioner in the home we purchased a couple years ago is fairly old and is in need of replacement. I do not wish to install a new system, however, since my future remodeling/redesigning of the house needs to come first, and I hope to do a geo-thermal system anyway on the basis of the those changes.
So what to do in the meantime when the upstairs temperatures hit 90 degrees?
My first option was to pull out the window AC unit I bought two years ago from Lowes. It is okay, but inefficient for our needs, as it will only cool the kitchen and part of the living room--leaving the rest of the house pretty hot. Moreover, in order to maintain even these temperatures it has to be running constantly at full blast, which when you see your electric bill becomes something of a shock. In other words, costs clearly exceed the returns.
Yesterday I began experimenting with a variation of an age-old remedy that people used long ago; namely natural convection and air displacement. Our partially finished basement maintains a consistent temperature of 65 degrees F. Upstairs it was 90 degrees F. The question was how to get cold air (which does not rise) to take the place of warm air. Here was (and is) the approach I have taken:
First, we have a whole house fan mounted in our ceiling and centrally located in the house. It essentially draws air from the house and exhausts it into the attic where it exits through the vents in the ends of the house (gables). In cool evenings, the process is simple: open windows around the house, turn the whole-house fan on and the cooler outside air rushes in and displaces the hot air that is being drawn up and out of the attic. No problem.
But what about when the outside air is just as hot or hotter than the air inside the house? You can turn the whole house fan on, but if you open the windows, it becomes even hotter in the house. If you open no windows at all, you are effectively accomplishing nothing except wasting electricity while the whole house fan just churns air with no real movement or displacement.
This is precisely the point at which I desire to get that 65 degree air from the basement to move upstairs where we need it. Since cold air does not rise, the challenge is to guide it efficiently upstairs. Here is what I have done so far to accomplish this:
1. First, turn on the whole house fan. This is the main engine for the process.
2. Close all house windows and lower any drapes to keep sunlight out (eliminate greenhouse effect).
3. I then place a large fan at the bottom of the basement steps at an angle pointing up the steps. In and of itself, this will do very little, as the warm air upstairs is a very effective barrier to any of the cold air coming up and at it. It simple will not penetrate that barrier--unless, I suppose you used a fan with hurricane force winds--sort of a brute-force and inefficient approach (though welding shops and barns often used these industrial sized fans in precisely this fashion).
4. Here is the key: I slightly open the door leading from the basement to the garage. The air in the garage is not as cool as the air in the basement, but it is in fact cooler than what is outside. It is sort of a "staging area" for starting the cooling process. I don't open the door much--only enough to allow what the whole-house fan is displacing upstairs to be drawn in from the garage to the basement. That air in turn begins a stream or current of air, which includes the cool 65 degree air. The stream goes through the basement, up the stairs (with a little assistance from the fan), and into the upstairs living space. The warm air, which ordinarily would block it, is exiting out the ceiling into the attic. Think of the upstairs of our house as a pond, the cool downstairs air as the inlet of cool spring water, and the whole house fan blowing into the attic as the water overflow or outlet.
The results are immediately evident. You have created a vacuum pathway for the cool 65 degree air to flow naturally and displace the hot air upstairs. The vacuum is so strong that my children have a hard time closing doors that they open. There is no wind outside, but if you go outside my garage (I keep all those doors shut so as not to get too much hot air in all at once), it sounds like the wail of a miniature hurricane!
You can then selectively partially open a window (not too many or you lose the power of your vacuum stream). For example, my wife was reading yesterday in our bedroom, so I cracked open the window next to her. Even though there was no wind blowing outside, a rush of air came flowing in and over her. Since moving air cools us (i.e., wind chill factor), it was the equivalent of a nice strong breeze blowing on her, even though it was blazing hot outside. But don't do too much of this around the house, as the real key is to keep a "stream" of air flowing from the basement to the upstairs. It seems to be working fairly well so far.
One more thing: It is good to start this process early in the morning before temperatures rise upstairs. Otherwise you really are only going to be able to keep it from getting as hot as it possible could get upstairs (you will simply maintain a hot temperature).
I hope some of you find this money-saving project helpful. :-)
Sunday, June 13, 2010
Thursday, February 4, 2010
Pulling the Well Pump at our House
Last Thursday water ceased flowing into our house. We have a drilled well with a submersible pump, so there are a number of things that could be causing this problem. I checked the obvious things first--breakers, the pressure switch inside the well casing (this is what tells the well pump to turn on and off). Everything checked out fine. I still had college related responsibilities, so this would have to wait until the weekend for my full attention.
Once the other possibilities had been eliminated, I resigned myself to the fact that I would have to pull the pump all the way out of the bottom of the well and check to see if the problem was with the wires that feed it power, or if the pump itself was toast. The following are a few pics of the process.
As you can see in this first pic, there is a fair amount of snow on the ground. As noted, we had already gone about a day and a half without running water before I could turn my attention to repairs. The moment I began working on it in earnest, it began snowing--really hard! The weather obviously made it much more challenging. As you can see, I tied an old 55 gallon drum to the side of the well casing to provide a smooth transition for the pipe to slide up and out of the well casing without damaging it. The pipe was attached with a rope to my tractor's front bucket as my plan to pull it out. With a check-valve in the pump, the entire pipe was full of water and VERY heavy. At this point I really did not know how deep the well was going to be.

As you can see it worked great! I decided to creep slowly in reverse so that I could keep a good eye on the process. My wife stood watch guiding it along on her end making sure nothing would get hung up. She was a real trooper in these frigid temps.

At this point I was still not sure how deep the well was going to be and I am still heading in reverse down a hill, in the snow, toward our largest pond. My initial guess was it would be 150 ft. deep. I was not far off in my estimate.

Here is a photo of the pipe about ten feet before the pump finally emerged from the well casing. This gizmo you see on the pipe is a torque arrestor. Basically, when the pump kicks on it twists the pipe with initial start-up force. Left unchecked, this torquing motion can rub on the pump wires and cause abrasion, shorting, breaking--basically failure of the system. Guess what happened in this case? The wires had worn away and split by precisely this type of movement; hence, no electrical power was getting to the pump. The torque arrestor is meant to center the pump as well as push against the well casing sides and dampen this torsion force. There was only one arrestor on the whole pipe when I pulled it out. When I reinstalled everything I put another two at near equal distances up the rest of the pipe. Hopefully that will cheer that problem in the future.

This last photo is of the pump. It is actually a very high quality one made by Gould. I was glad I did not have to replace it yet, as a good quality one for my well runs $400-$600. The tractor is barely visible (above my back)--that is the full length of the pipe. The total depth down to the pump was ca. 130 ft. I could have spliced the line where it broke, but it is such a job pulling the pump, I just decided to install brand new wire. The stuff is not cheap, but it is a whole lot cheaper than having someone else do it for you, or coming back and doing again in a year.

I managed to get everything rewired and reinstalled by about 10:30pm Sunday evening. I made some changes to the pressure switch level and replaced the pump's panel breaker with a new one, but we now have water again. Hurrah! It is always a good idea to pour a bit of bleach into a well when you mess with it--to shock treat it against any bacteria introduced. Just be sure to run it for a good while to clear the bleach before drinking water from the well.
Overall, I am pleased with the end results. As I prayed through each step of the project, the Lord was gracious in helping me trouble-shoot at a number of points where I was stumped. The best part was getting to take a shower again after three days. We were all getting pretty ripe, heheheh.
Sunday, September 20, 2009
"Raising Children is Like . . . ."
As a homeschooling father, I have come to see some parallels between raising children and writing letters. In our case we are in the process of raising seven at the same time, which can be a challenge in its own right. They are all like living letters which reflect back the stewardship of the gift of life given by God. To be sure, the apostle Paul used precisely this metaphor to describe his relationship as a spiritual father to the Corinthian believers in Christ. He writes, "You yourselves are our letter, written on our hearts, known and read by everybody. You show that you are a letter from Christ, the result of our ministry, written not with ink but with the Spirit of the living God, not on tablets of stone but on tablets of human hearts" (2 Cor 3:2-3).
One thing I have discovered about writing on human hearts--whether through parenting or teaching in higher education--is that you wish to impart those things which you believe most enduring and important. For example, over all things in this life I long for our children to love the Lord Jesus Christ deeply and to have a whole-hearted commitment to Him. Similarly, I also want to impart to them wholesome experiences which focuses their attention on beauty in God's creation. Such beauty is a foreshadow of Christ's kingdom in the age to come.
I suppose one can take several different paths in parenting in order to accomplish this second objective, but the one that makes most sense to me is what was handed down to me by my own mother--a homesteading and farming way of life. Interestingly, she received this same heritage growing up on her parents' 120+ acre farm in upstate New York--a heritage passed down in turn to her father by his own father. All the qualities I love and admire about my mother--her endurance as a widow with three young children, her love and sensitivity to others, and her work ethic, etc. can be traced back in part to her development in this heritage.
Building ponds and raising animals is one of the current chapters I am writing in the lives of these young ones with which my wife and I are entrusted. These are living letters which will never go out of print and, God willing, will be passed on to the next generation long after we are gone.
* * * * * * * * * * * * * * * * * * * * * * * * * * * * * * * * * * * * * * *
Pond #3 Construction Pictures
Ever since I started the first pond, I had in mind precisely where the second one would go--right across the driveway, which I can later excavate away and replace with a bridge. However, the idea for a third pond developed a bit later as I would mow and reflect on the layout of the property. Higher up in our acreage there are some trees in a small and shallow gully area. It always seemed to shout out to me as the perfect place to locate a shaded pond with an island. Moreover, this location is perfect for using the pond as a watering source for goats, chickens, and particularly our ducks, as it is right near the current stable and, God-willing, future location of a full size barn.
The occasion for breaking ground was actually precipitated by the need for strips of grass sod on the second pond's dam. So I took the laser level, shot my lines, and spray-painted and flagged the various water levels. This would be the area from within which I would harvest my grass sod. This layout job was a little trickier than most, since it was my goal to leave all trees intact, close to the water, but not so close as to bring about premature death. I probably reshot with the laser three different configurations before I finally found what I was looking for in this third pond.
The pics which follow pick up on the process after I have already harvested the grass sod and had started to excavate the key trench for the clay core dam. But I think you will get the general idea from what follows.
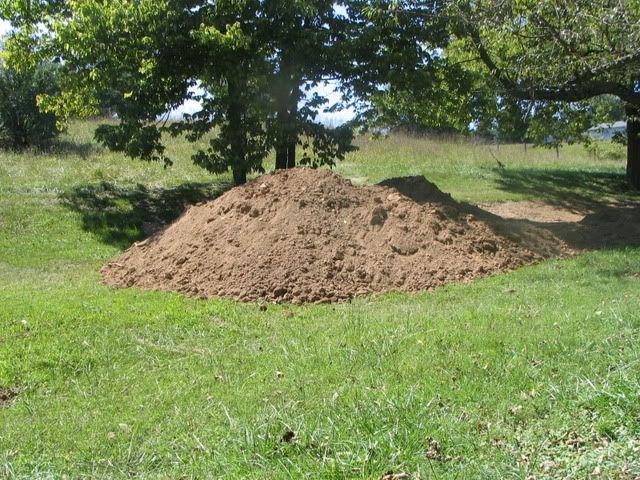
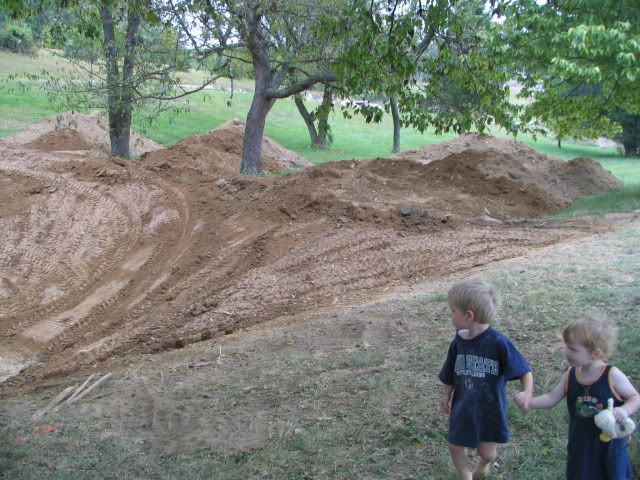
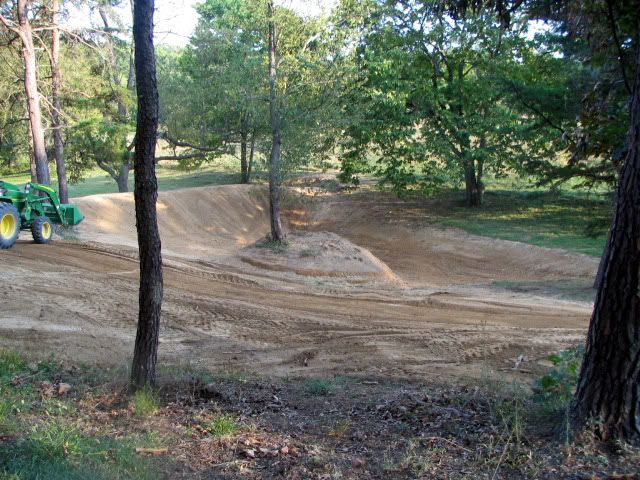
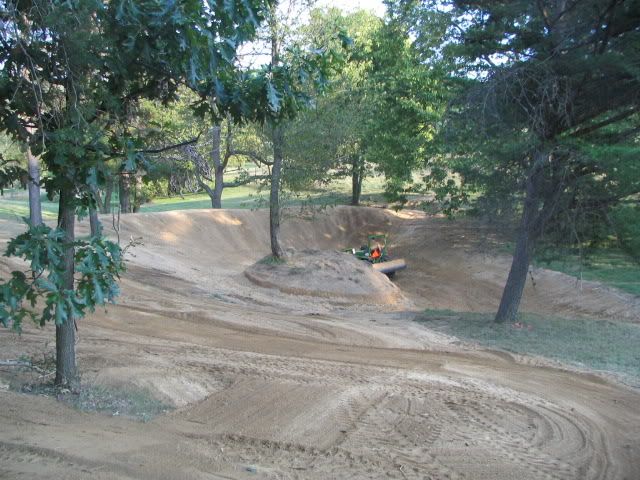
This pond construction sequence begins with . . . you guessed it, piles of dirt. I did not think to take any pics prior to stripping the grass sod away, as I was simply focused on getting the second pond's dam protected with a grass cover. Oh well:
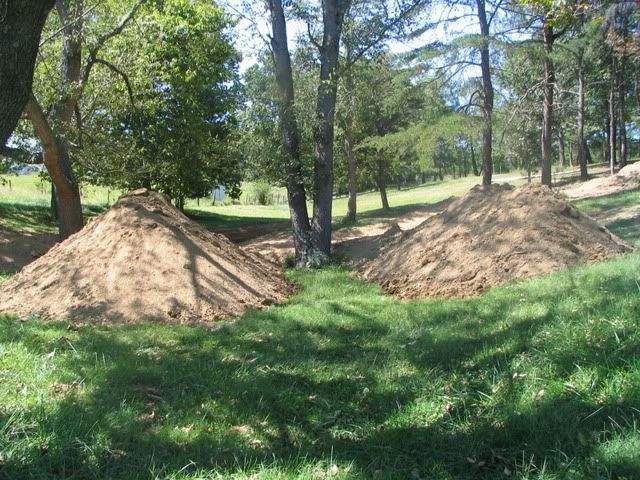
At the deeper pool end of the pond is the core trench. If you recall from the previous pond construction sequences on this blog (particularly pond #1), to have a successful pond one cannot simply pile dirt up for a dam. You need to excavate down to either hardpan clay, or as in the case of our region, Weikert shale. This core serves two basic purposes: first it locks the dam structure in place much like a keyway. Second, as it is backfilled with moist clay and compacted down, it forms a watertight barrier to water. Obviously the goal of a pond is to hold water, and a clay core is a central aspect of having a successful water-retaining pond:
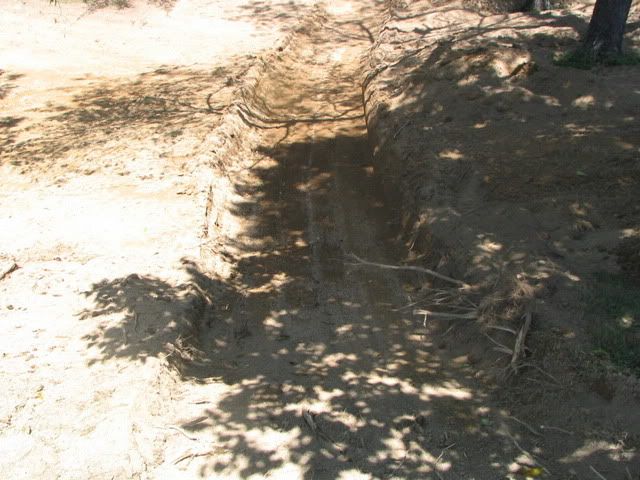
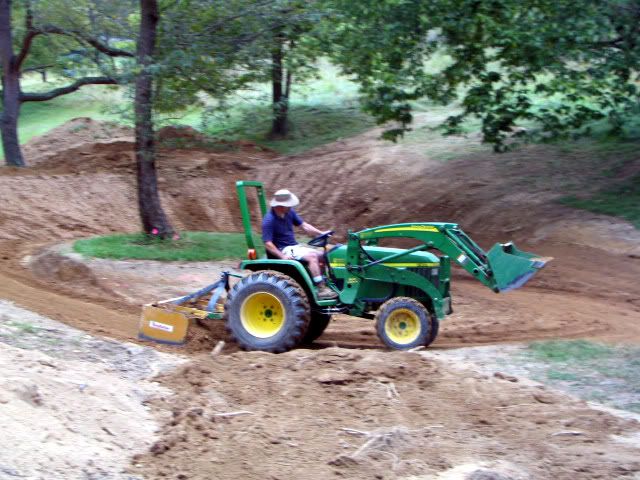
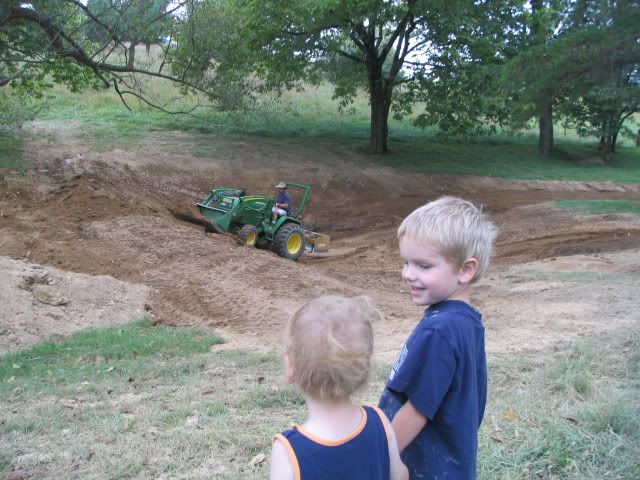
The core trench can actually get quite deep, as this sequence of pics demonstrate. I actually had to go down ca. 10-12 ft. before I hit the clay for which I was looking. In the past I have used both backhoes and bulldozers to excavate core trenches. Without question the best machine for the job is an excavator, but when on a very tight budget you use what you have--it just takes much longer:
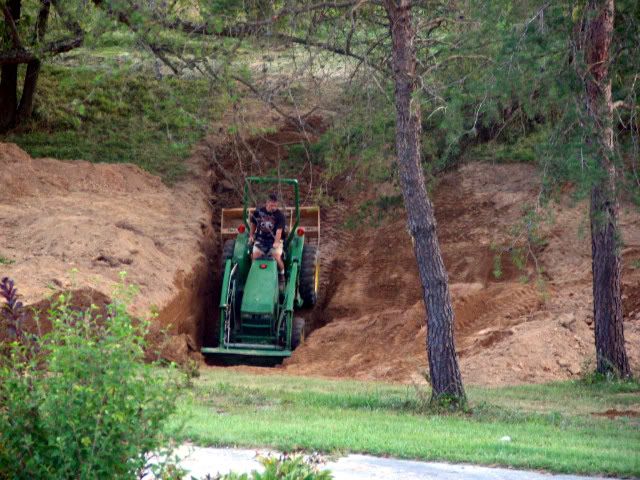
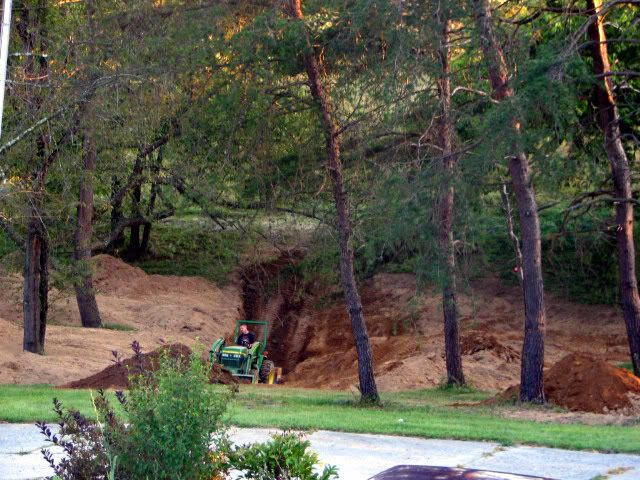
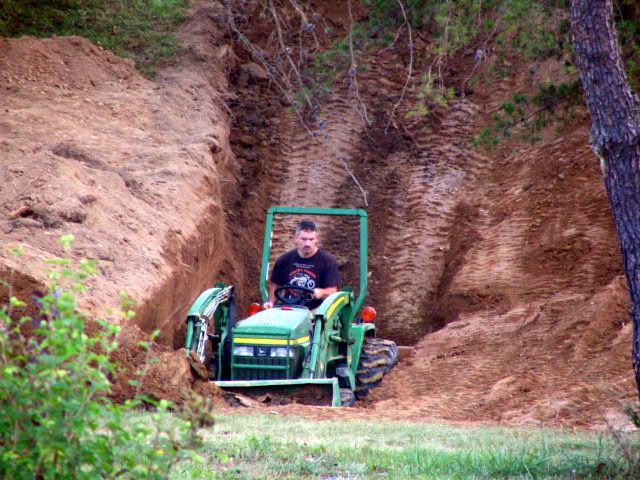
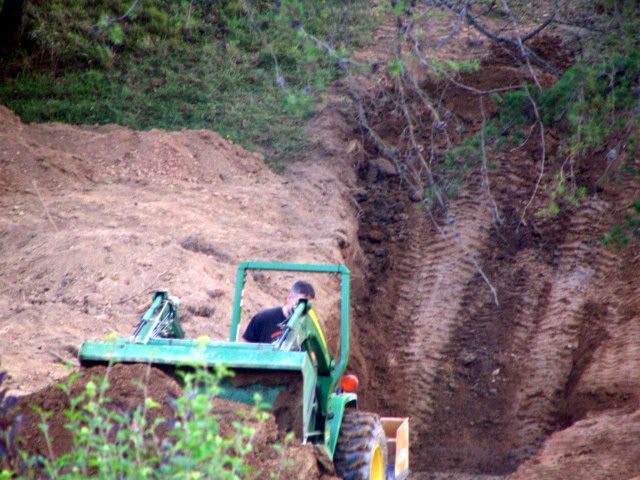
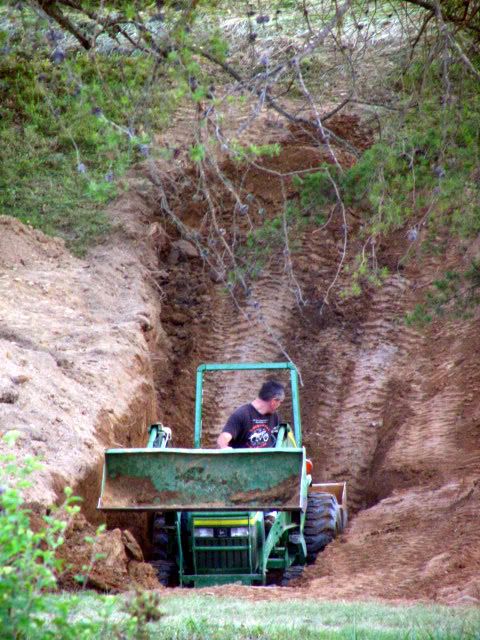
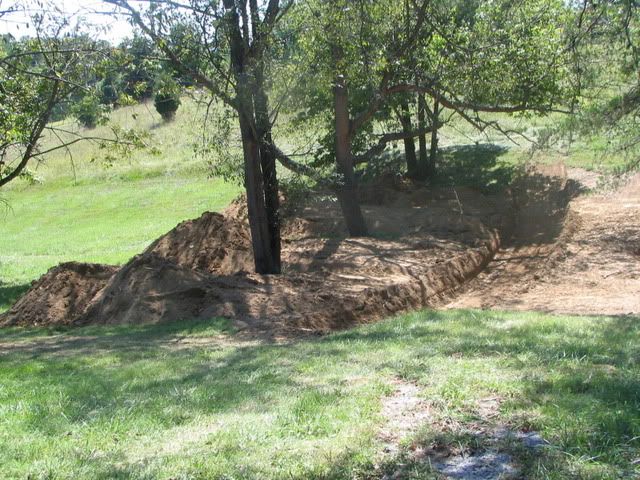
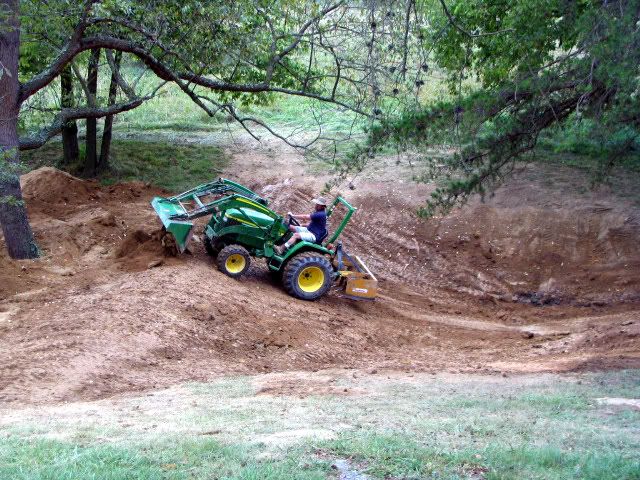
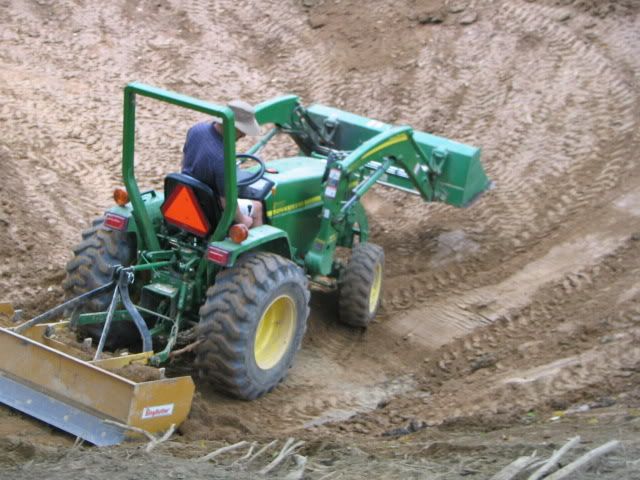
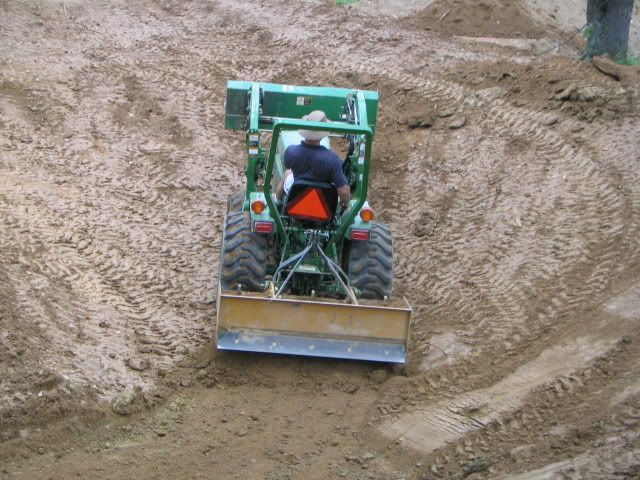
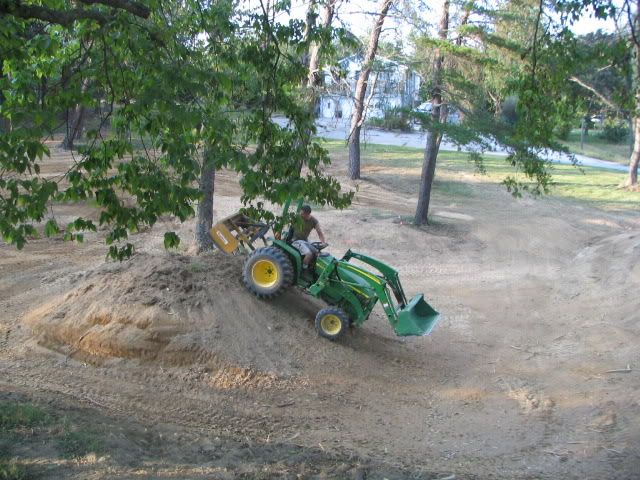
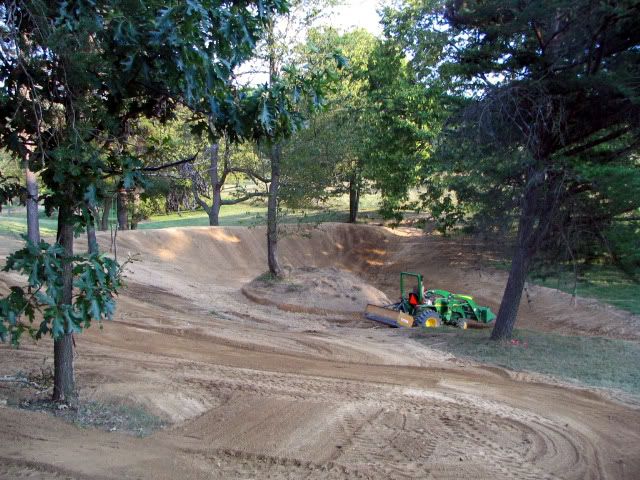
As you can imagine, if all the good clay is 10-12 ft. down, it is going to pose quite a challenge in getting to it in order to backfill the core trench. My approach was as follows: I would use the boxblade to drag away the silt and other materials which hundreds of years of erosion had deposited in this swale. This necessitated pulling it away from the trench and pushing it into huge piles in the center and sides of the pond basin. When good clay material emerged, I would scoop it out and deposit in the core trench in lifts about a foot deep. I would then run the tractor back and forth across the entire area of the dam until it was all firmly compacted. Whenever there was insufficient moisture in the clay to aid in compaction, one of my sons would stand off to the side and spray the whole area down with a hose. It worked beautifully! By the time we got around to taking a picture of it, I had already backfilled and compacted the dam almost to its original ground level:
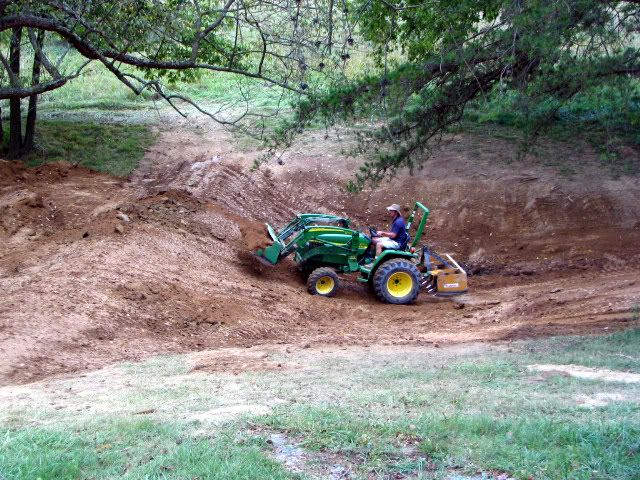
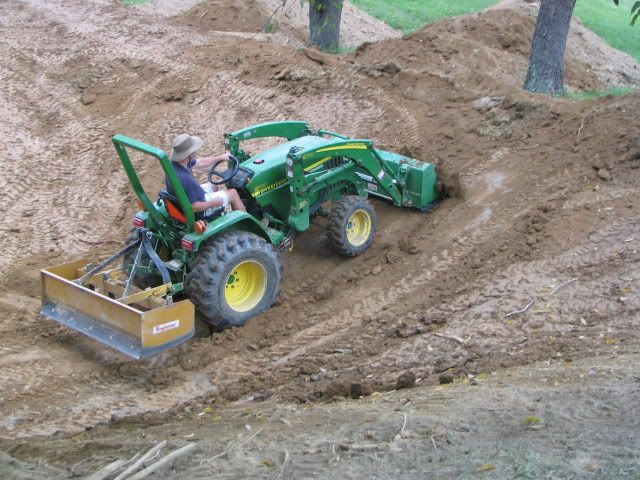
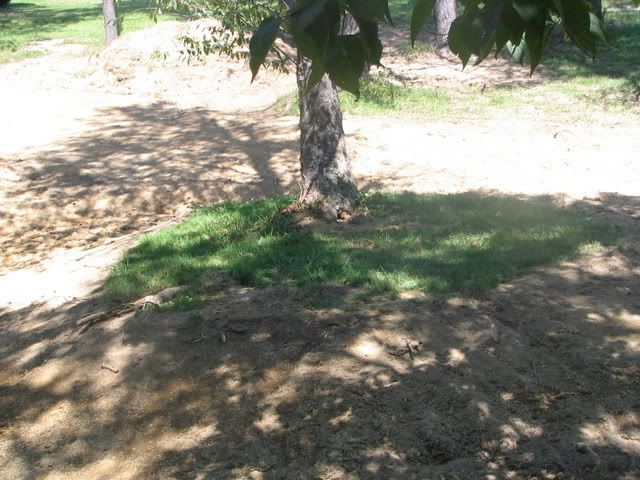
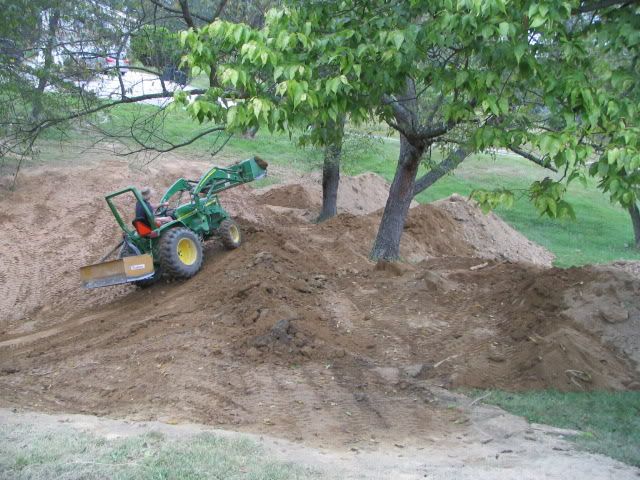
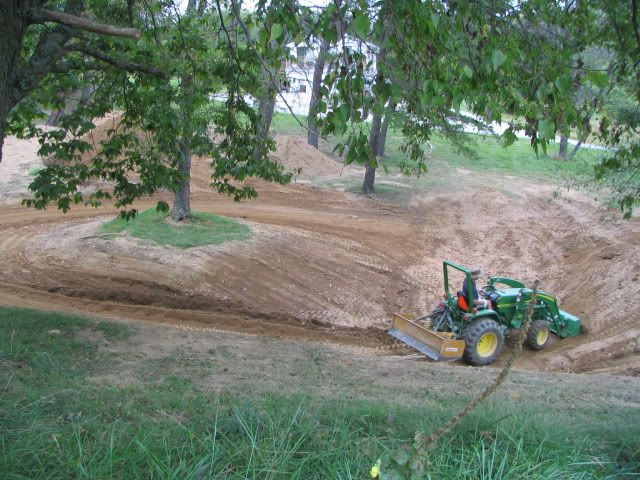
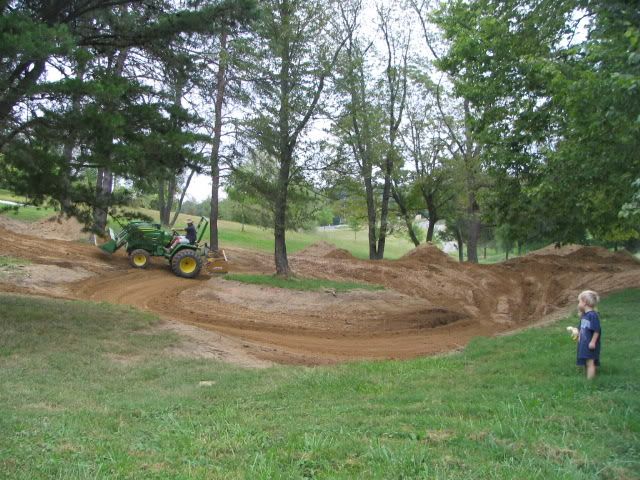
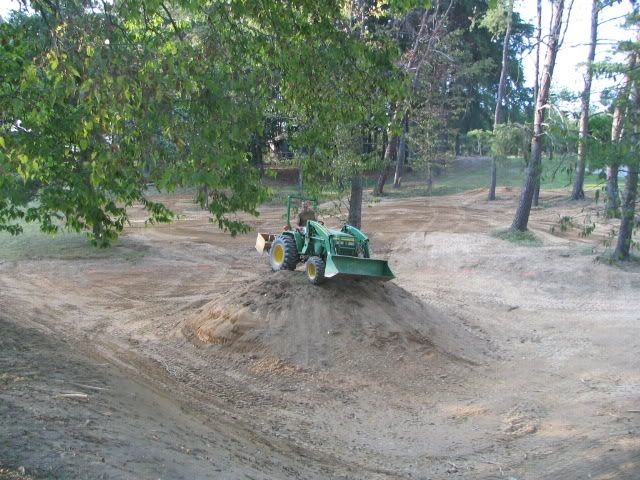
Now came the precise question of the island in the middle. There just happened to be a spot where a tree was located, and while the tree had obvious signs of disease and woodpecker damage, it was still alive. The average tree on an island this close to water would likely die anyway, so this would do fine. When it dies, I will simply fell it and plant something like a river maple or weeping willow in its place. Working around the island and sculting it within the bounds of the basin did prove to be something of a challenge:
Just as everything was going well, two structural engineers showed up unannounced to inspect the process and converse among themselves. Although I knew everything was sound, I was nevertheless a bit nervous:


Although there was posturing and attempts to mark out their territory, in the end they had no substantive complaints and went on about their business. I had the feeling though that I had not seen the last of them. But for my part I just stayed focused on my work:
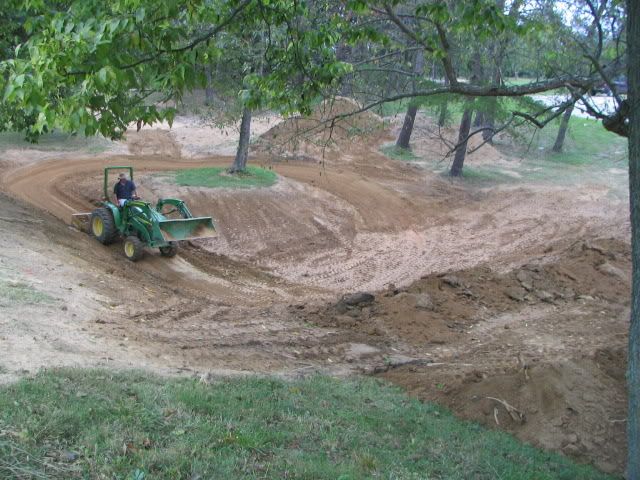
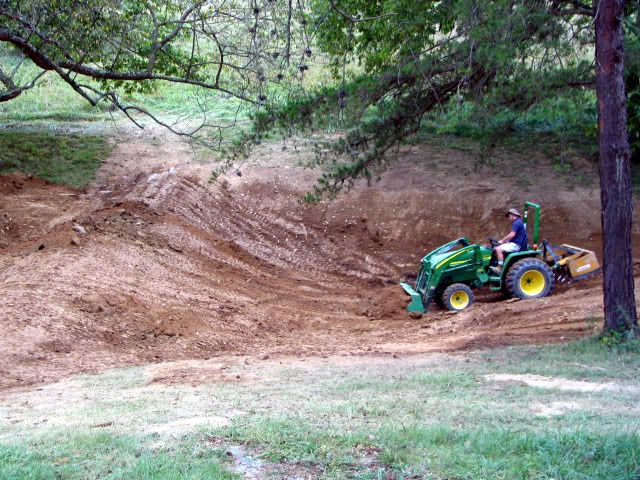
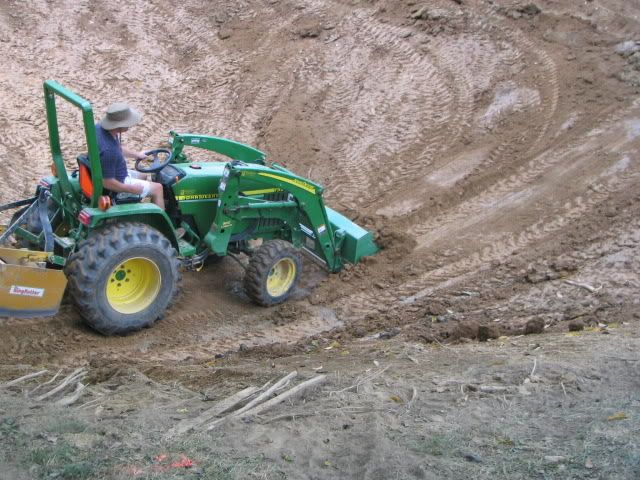
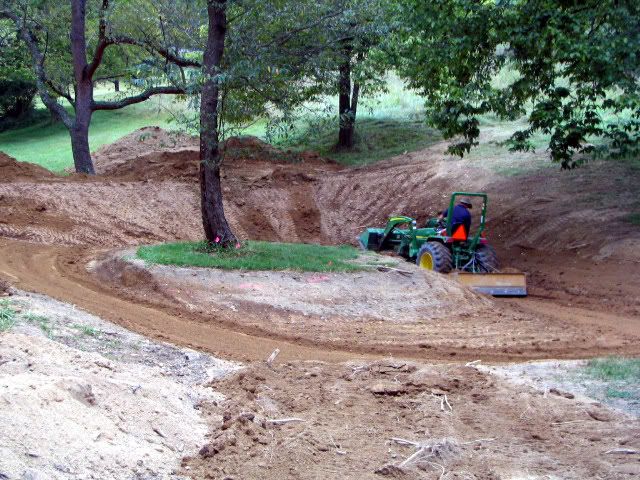
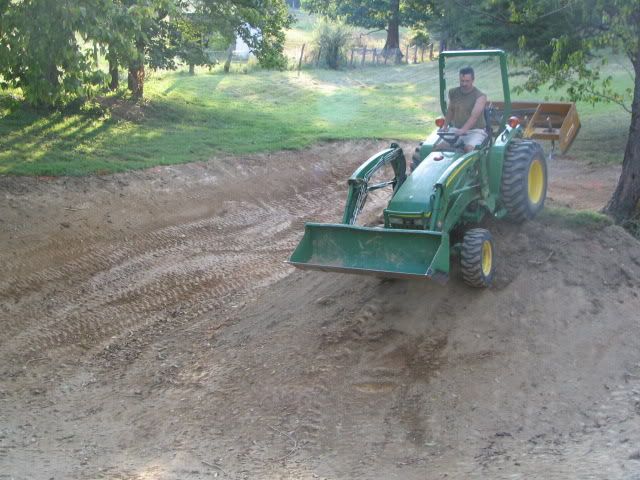
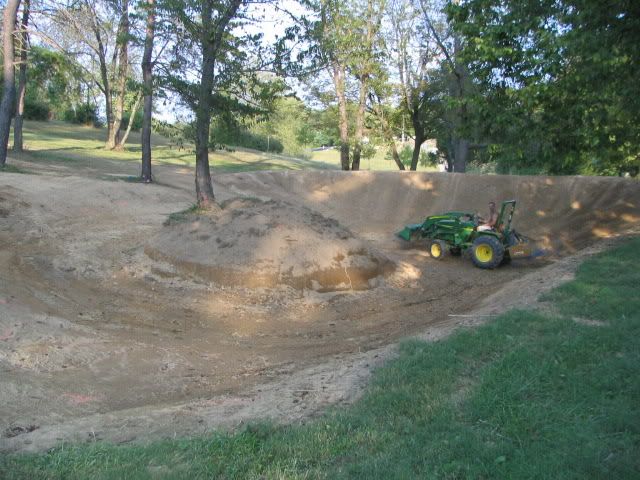
The job was now a matter of sculpting around the island and removing the top burden down to the clay so that I could compact it around the entire pond basin, thus forming a water barrier. I was also aware that I was in a not-so-subtle race against the clock, since rain could potentially fill what I had already excavated, forcing me to rent a generator and pump as I had to with the second pond twice. That is expensive and no fun, so I put my head down and put in some long hours:

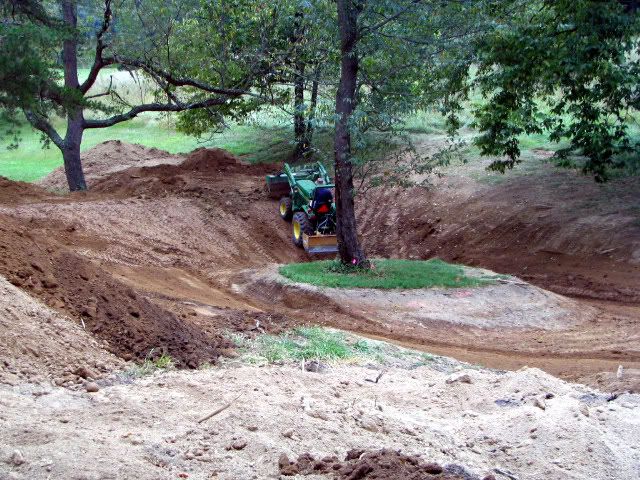
The pond was now really begin to take shape, and I was reminded once again that for all our planning and design, we are ultimately at the mercy of where the soil, clay, and shale are located. In other words, to some degree you have to "discover" where the pond is at and how deep it is going to be. In that way, it is something of an art. One surprise along these lines for me was the final water depth. I had no idea that I would end up with a pond that would be 12-14 ft. deep at full pool (though it tapers back to a shallower end):

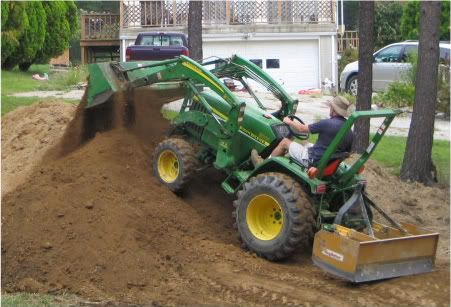
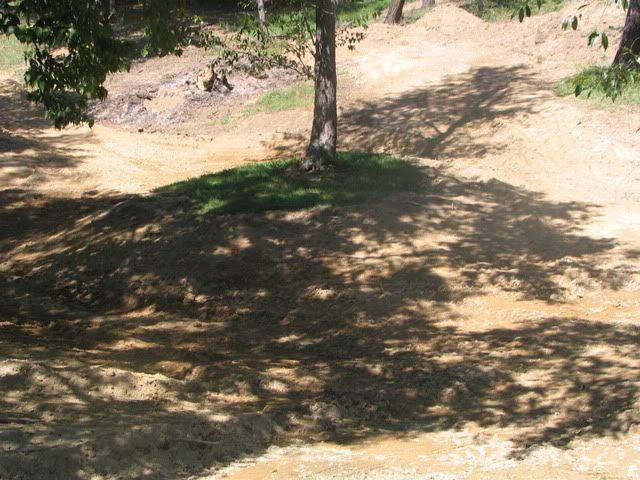
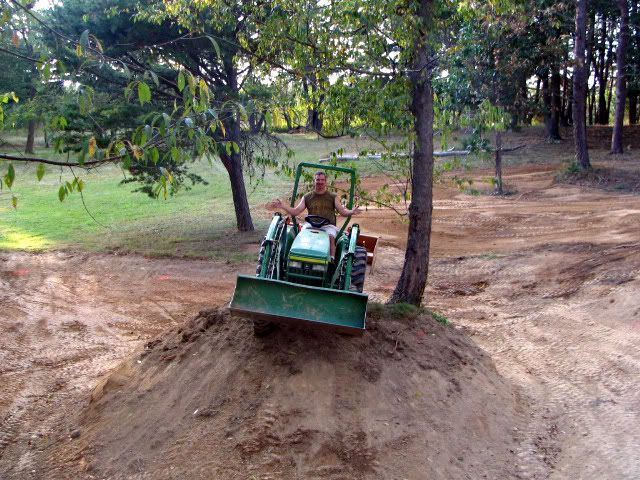
At this point I thought it wise to set up the laser again and recheck my work, and I am glad I did. While the dam and the sides were spot on, my readings indicated that most of my island would be submerged at full pool! That would not do, so after using some marker paint to provide layout, I went to my topsoil pile and brought in dirt with which to build the island up as needed. It was a bit of a trick getting the tractor up on that island (due to height) to smooth things out, but I managed. I will have to replant grass on it, but that is not a problem since it is all rich topsoil:
Now for the finishing touches and last bit of work throughout:

I carved out overflows on each side of the dam (into the hillside), and smoothed out all the surrounding area which will be grass around the pond (that portion of land had been marked by depressions, holes, etc.). The last thing to do is plant some grass, mulch it with straw (my sinuses hate that part), and then wait for the winter rains to come and fill the pond:
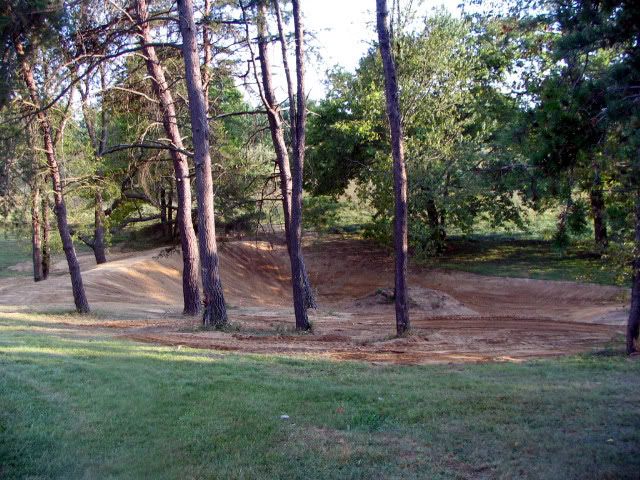
All in all I am exceptionally pleased with the outcome. The ducks will love the pond (especially the island), and I will fence it off for the goats as well. It is very picturesque and peaceful among all the trees, so I will likely put a nice bench on which to sit and contemplate. The water level will allow me even to stock it with some fish.
I suppose the final picture should be of my trusty 790 4x4 John Deere tractor, which is as nimble as it is powerful. I am thankful to God for the blessing of having it.

One thing I have discovered about writing on human hearts--whether through parenting or teaching in higher education--is that you wish to impart those things which you believe most enduring and important. For example, over all things in this life I long for our children to love the Lord Jesus Christ deeply and to have a whole-hearted commitment to Him. Similarly, I also want to impart to them wholesome experiences which focuses their attention on beauty in God's creation. Such beauty is a foreshadow of Christ's kingdom in the age to come.
I suppose one can take several different paths in parenting in order to accomplish this second objective, but the one that makes most sense to me is what was handed down to me by my own mother--a homesteading and farming way of life. Interestingly, she received this same heritage growing up on her parents' 120+ acre farm in upstate New York--a heritage passed down in turn to her father by his own father. All the qualities I love and admire about my mother--her endurance as a widow with three young children, her love and sensitivity to others, and her work ethic, etc. can be traced back in part to her development in this heritage.
Building ponds and raising animals is one of the current chapters I am writing in the lives of these young ones with which my wife and I are entrusted. These are living letters which will never go out of print and, God willing, will be passed on to the next generation long after we are gone.
* * * * * * * * * * * * * * * * * * * * * * * * * * * * * * * * * * * * * * *
Pond #3 Construction Pictures
Ever since I started the first pond, I had in mind precisely where the second one would go--right across the driveway, which I can later excavate away and replace with a bridge. However, the idea for a third pond developed a bit later as I would mow and reflect on the layout of the property. Higher up in our acreage there are some trees in a small and shallow gully area. It always seemed to shout out to me as the perfect place to locate a shaded pond with an island. Moreover, this location is perfect for using the pond as a watering source for goats, chickens, and particularly our ducks, as it is right near the current stable and, God-willing, future location of a full size barn.
The occasion for breaking ground was actually precipitated by the need for strips of grass sod on the second pond's dam. So I took the laser level, shot my lines, and spray-painted and flagged the various water levels. This would be the area from within which I would harvest my grass sod. This layout job was a little trickier than most, since it was my goal to leave all trees intact, close to the water, but not so close as to bring about premature death. I probably reshot with the laser three different configurations before I finally found what I was looking for in this third pond.
The pics which follow pick up on the process after I have already harvested the grass sod and had started to excavate the key trench for the clay core dam. But I think you will get the general idea from what follows.
This pond construction sequence begins with . . . you guessed it, piles of dirt. I did not think to take any pics prior to stripping the grass sod away, as I was simply focused on getting the second pond's dam protected with a grass cover. Oh well:


At the deeper pool end of the pond is the core trench. If you recall from the previous pond construction sequences on this blog (particularly pond #1), to have a successful pond one cannot simply pile dirt up for a dam. You need to excavate down to either hardpan clay, or as in the case of our region, Weikert shale. This core serves two basic purposes: first it locks the dam structure in place much like a keyway. Second, as it is backfilled with moist clay and compacted down, it forms a watertight barrier to water. Obviously the goal of a pond is to hold water, and a clay core is a central aspect of having a successful water-retaining pond:


The core trench can actually get quite deep, as this sequence of pics demonstrate. I actually had to go down ca. 10-12 ft. before I hit the clay for which I was looking. In the past I have used both backhoes and bulldozers to excavate core trenches. Without question the best machine for the job is an excavator, but when on a very tight budget you use what you have--it just takes much longer:


As you can imagine, if all the good clay is 10-12 ft. down, it is going to pose quite a challenge in getting to it in order to backfill the core trench. My approach was as follows: I would use the boxblade to drag away the silt and other materials which hundreds of years of erosion had deposited in this swale. This necessitated pulling it away from the trench and pushing it into huge piles in the center and sides of the pond basin. When good clay material emerged, I would scoop it out and deposit in the core trench in lifts about a foot deep. I would then run the tractor back and forth across the entire area of the dam until it was all firmly compacted. Whenever there was insufficient moisture in the clay to aid in compaction, one of my sons would stand off to the side and spray the whole area down with a hose. It worked beautifully! By the time we got around to taking a picture of it, I had already backfilled and compacted the dam almost to its original ground level:


Now came the precise question of the island in the middle. There just happened to be a spot where a tree was located, and while the tree had obvious signs of disease and woodpecker damage, it was still alive. The average tree on an island this close to water would likely die anyway, so this would do fine. When it dies, I will simply fell it and plant something like a river maple or weeping willow in its place. Working around the island and sculting it within the bounds of the basin did prove to be something of a challenge:


Just as everything was going well, two structural engineers showed up unannounced to inspect the process and converse among themselves. Although I knew everything was sound, I was nevertheless a bit nervous:


Although there was posturing and attempts to mark out their territory, in the end they had no substantive complaints and went on about their business. I had the feeling though that I had not seen the last of them. But for my part I just stayed focused on my work:


The job was now a matter of sculpting around the island and removing the top burden down to the clay so that I could compact it around the entire pond basin, thus forming a water barrier. I was also aware that I was in a not-so-subtle race against the clock, since rain could potentially fill what I had already excavated, forcing me to rent a generator and pump as I had to with the second pond twice. That is expensive and no fun, so I put my head down and put in some long hours:


The pond was now really begin to take shape, and I was reminded once again that for all our planning and design, we are ultimately at the mercy of where the soil, clay, and shale are located. In other words, to some degree you have to "discover" where the pond is at and how deep it is going to be. In that way, it is something of an art. One surprise along these lines for me was the final water depth. I had no idea that I would end up with a pond that would be 12-14 ft. deep at full pool (though it tapers back to a shallower end):


At this point I thought it wise to set up the laser again and recheck my work, and I am glad I did. While the dam and the sides were spot on, my readings indicated that most of my island would be submerged at full pool! That would not do, so after using some marker paint to provide layout, I went to my topsoil pile and brought in dirt with which to build the island up as needed. It was a bit of a trick getting the tractor up on that island (due to height) to smooth things out, but I managed. I will have to replant grass on it, but that is not a problem since it is all rich topsoil:


Now for the finishing touches and last bit of work throughout:


I carved out overflows on each side of the dam (into the hillside), and smoothed out all the surrounding area which will be grass around the pond (that portion of land had been marked by depressions, holes, etc.). The last thing to do is plant some grass, mulch it with straw (my sinuses hate that part), and then wait for the winter rains to come and fill the pond:


All in all I am exceptionally pleased with the outcome. The ducks will love the pond (especially the island), and I will fence it off for the goats as well. It is very picturesque and peaceful among all the trees, so I will likely put a nice bench on which to sit and contemplate. The water level will allow me even to stock it with some fish.
I suppose the final picture should be of my trusty 790 4x4 John Deere tractor, which is as nimble as it is powerful. I am thankful to God for the blessing of having it.

Saturday, August 22, 2009
The Second Pond is Full!
Yesterday we were hit with a storm which carried a deluge. It is without doubt the most rain I have seen fall at one time in this area. To be sure, I have not seen this kind of rain event anywhere in many years. Within 20 minutes the entire second pond went from a mere puddle to full brim and overflowing. I had not anticipated it to fill this quickly, but knew I was about to find out if the emergency overflow would work as planned. It did, but it was nerve-wracking to stand by and watch it tested in this fashion.
Anyway, below are some photos of this now-full second pond. I have also included a pic of the siphon overflow system which I had already added to the first pond over the summer. This was the first occasion that I was able to see it in action. There is also a little diagram at the end of this post which will hopefully help illustrate how the overflow/siphon system works.
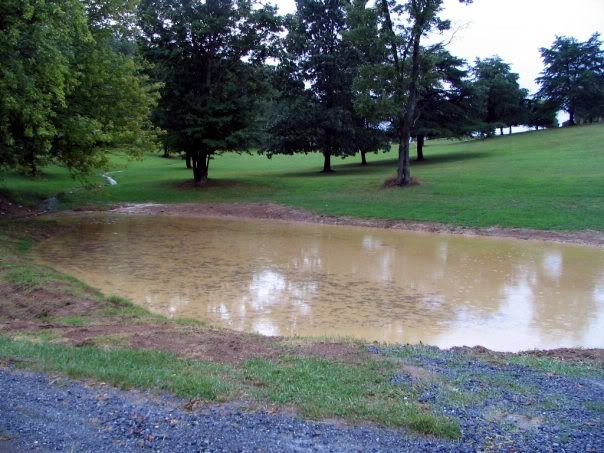
This view of the second pond is from our driveway, with the first pond immediately to one's back. Notice how much driveway gravel was moved by the storm out of the driveway and deposited in the grass. I am thankful for the tractor's box blade, as it makes repairing and redressing the driveway considerably easier. Nevertheless, it is still going to require some raking by hand. Those of you who have moved gravel in this fashion already know just how slow and tedious this task can be:
Same perspective, but back a little bit:
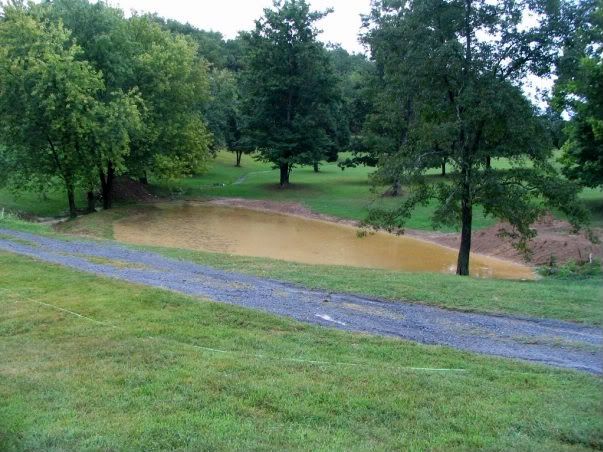
This perspective is from the opposite side of the pond looking toward the driveway. You can see the dam for the first pond in the far background:
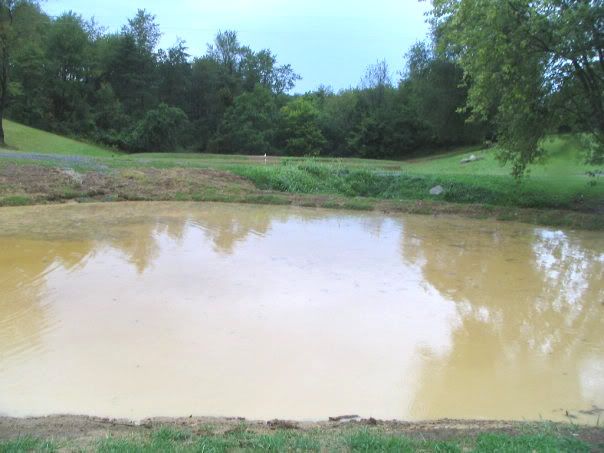
Looking toward the second pond's dam and beautiful trees gives you a sense for how high the water was:
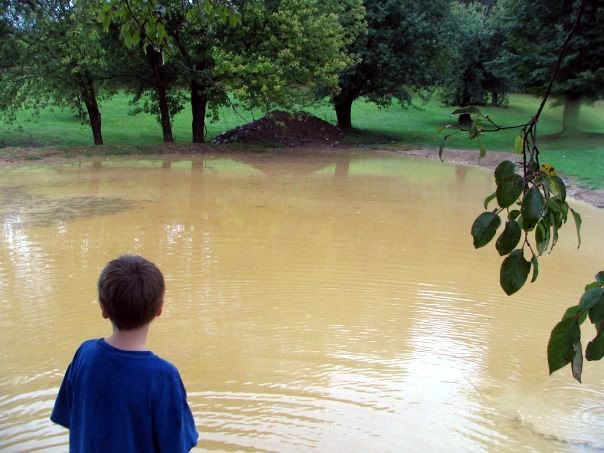
From the backside we see the flow from the surrounding watershed into the pond. You can also make out where my emergency spill-way is flowing:

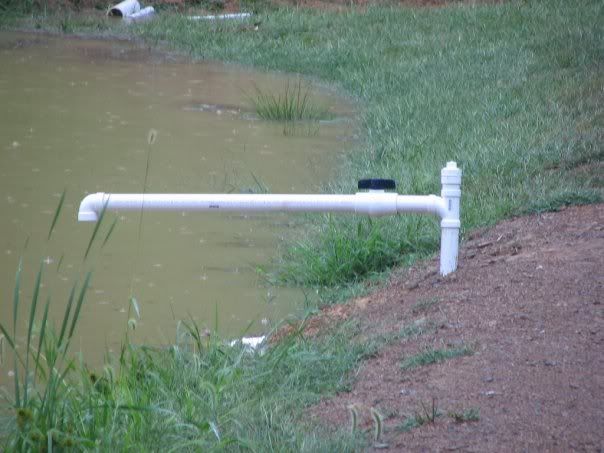
This is the siphon system I installed on the first pond. I still need to drop a pipe vertically to mark the water level I wish for a full siphon to begin. As it currently is, I was able to induce a full siphon by closing the ball valve in the pic--this action cuts off the air supply and a self-sustaining siphon process from the pond through the pipe commences. Once initiated, one could empty the whole pond if the valve were left closed:
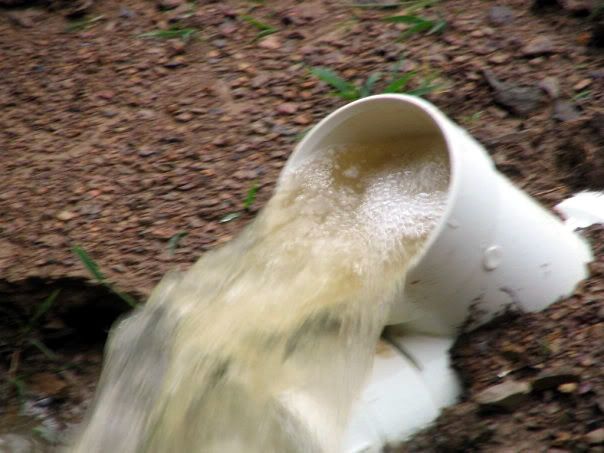
Here is the outlet of the overflow/siphon system at the base of the dam. This is the average flow rate when the water is simply passing through it without a siphon action. When I closed the ball valve and created a full siphon, the water blasted out of this 4" pipe like a torrent and went about 4 feet into the air! In the future, when the pond rises to a level which covers the (to-be-installed) vertical pipe, the air supply is blocked and a siphon begins until the pond level drops below the pipe and air is reintroduced--thus breaking the siphon:
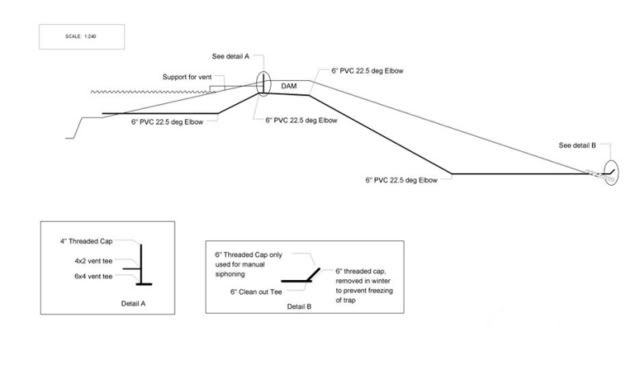
Below is a diagram which is very similar to the siphon system I installed. I found this diagram on the Pond Boss forum and, again, it is the closest thing I have found to illustrate what I actually installed. Rather than 6" PVC, I installed 4" (the price difference is considerable), and my angles and pipe depths are different:
Anyway, below are some photos of this now-full second pond. I have also included a pic of the siphon overflow system which I had already added to the first pond over the summer. This was the first occasion that I was able to see it in action. There is also a little diagram at the end of this post which will hopefully help illustrate how the overflow/siphon system works.
This view of the second pond is from our driveway, with the first pond immediately to one's back. Notice how much driveway gravel was moved by the storm out of the driveway and deposited in the grass. I am thankful for the tractor's box blade, as it makes repairing and redressing the driveway considerably easier. Nevertheless, it is still going to require some raking by hand. Those of you who have moved gravel in this fashion already know just how slow and tedious this task can be:

Same perspective, but back a little bit:

This perspective is from the opposite side of the pond looking toward the driveway. You can see the dam for the first pond in the far background:

Looking toward the second pond's dam and beautiful trees gives you a sense for how high the water was:

From the backside we see the flow from the surrounding watershed into the pond. You can also make out where my emergency spill-way is flowing:

This is the siphon system I installed on the first pond. I still need to drop a pipe vertically to mark the water level I wish for a full siphon to begin. As it currently is, I was able to induce a full siphon by closing the ball valve in the pic--this action cuts off the air supply and a self-sustaining siphon process from the pond through the pipe commences. Once initiated, one could empty the whole pond if the valve were left closed:

Here is the outlet of the overflow/siphon system at the base of the dam. This is the average flow rate when the water is simply passing through it without a siphon action. When I closed the ball valve and created a full siphon, the water blasted out of this 4" pipe like a torrent and went about 4 feet into the air! In the future, when the pond rises to a level which covers the (to-be-installed) vertical pipe, the air supply is blocked and a siphon begins until the pond level drops below the pipe and air is reintroduced--thus breaking the siphon:

Below is a diagram which is very similar to the siphon system I installed. I found this diagram on the Pond Boss forum and, again, it is the closest thing I have found to illustrate what I actually installed. Rather than 6" PVC, I installed 4" (the price difference is considerable), and my angles and pipe depths are different:

Subscribe to:
Posts (Atom)